
Craving something sweet that’s easy and fun to make? Look no further! This No Bake Oreo Cheesecake is a simple and delicious treat that anyone can whip up. With just a few basic ingredients, you can create a creamy dessert that will impress your friends and family. Join me as we explore the easy steps to make this Oreo sensation, perfect for any occasion. Let’s dig in!
Ingredients
Main Ingredients
- 24 Oreo cookies, finely crushed
- 4 tablespoons unsalted butter, melted
- 16 oz cream cheese, softened to room temperature
- 1 cup powdered sugar
- 1 teaspoon vanilla extract
- 1 cup heavy whipping cream, chilled
- 12 Oreo cookies, coarsely chopped for filling
- 6 Oreo cookies, crushed for topping
The main ingredients for your no bake Oreo cheesecake are simple but essential. The Oreo cookies form the base and filling, giving it that delicious chocolate flavor. The cream cheese adds creaminess and tang, while the heavy cream gives it a light texture. And, the unsalted butter helps bind the cookie crumbs together for a sturdy crust.
Optional Ingredients
- Chocolate shavings
- Vanilla extract
You can enhance your cheesecake with chocolate shavings for a fancy touch. A bit of vanilla extract adds more flavor, but it’s optional since the Oreos are rich enough.
Measurements and Substitutions
- Alternative cookie options: You can use any chocolate sandwich cookie if you prefer.
- Dairy-free cream cheese alternatives: Look for brands like Tofutti or Kite Hill for a dairy-free option.
These tips on measurements and substitutions help you customize your cheesecake. Don’t hesitate to try new flavors or find what works for you. Enjoy the process!
Step-by-Step Instructions
Preparing the Crust
- Start with 24 Oreo cookies. Place them in a bag and crush them finely. You can use a rolling pin or your hands.
- Next, melt 4 tablespoons of unsalted butter in a bowl. Combine the crushed cookies with the melted butter. Mix until it looks like wet sand.
- Take a 9-inch springform pan. Firmly press the Oreo mixture into the bottom. Use the back of a measuring cup to make it even. Place it in the fridge while you work on the filling.
Making the Cheesecake Filling
- Grab a large mixing bowl and add 16 oz of softened cream cheese. Beat it on medium speed until it is smooth and creamy.
- Slowly add 1 cup of powdered sugar and 1 teaspoon of vanilla extract. Keep mixing until everything is fluffy and well combined.
- In another bowl, whip 1 cup of chilled heavy cream on high speed. Beat it until stiff peaks form. This makes the filling light and airy.
Assembling the Cheesecake
- Gently fold the whipped cream into the cream cheese mixture. Use a spatula to keep it light.
- Add 12 coarsely chopped Oreo cookies to the filling. Stir gently to mix them in evenly.
- Pour this creamy filling over the chilled crust. Spread it out evenly. Tap the pan on the counter to remove air bubbles.
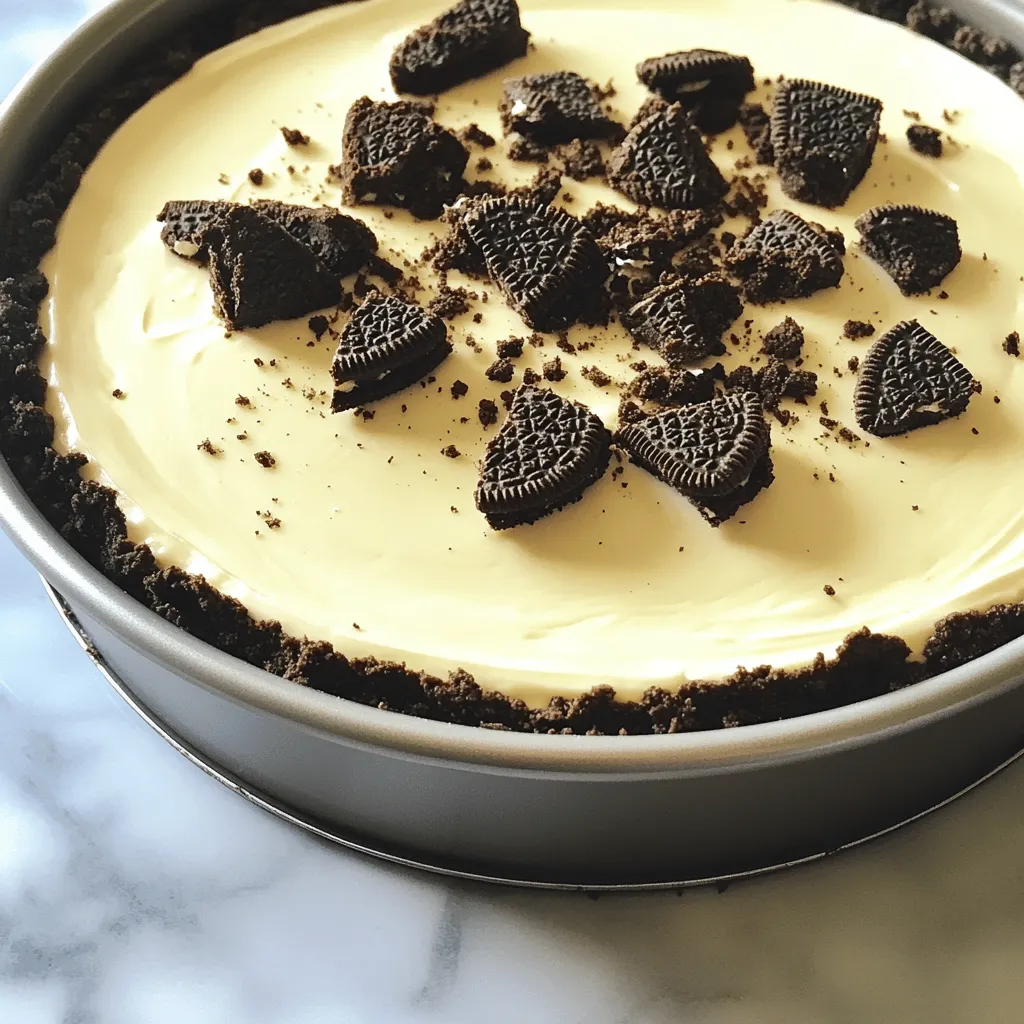
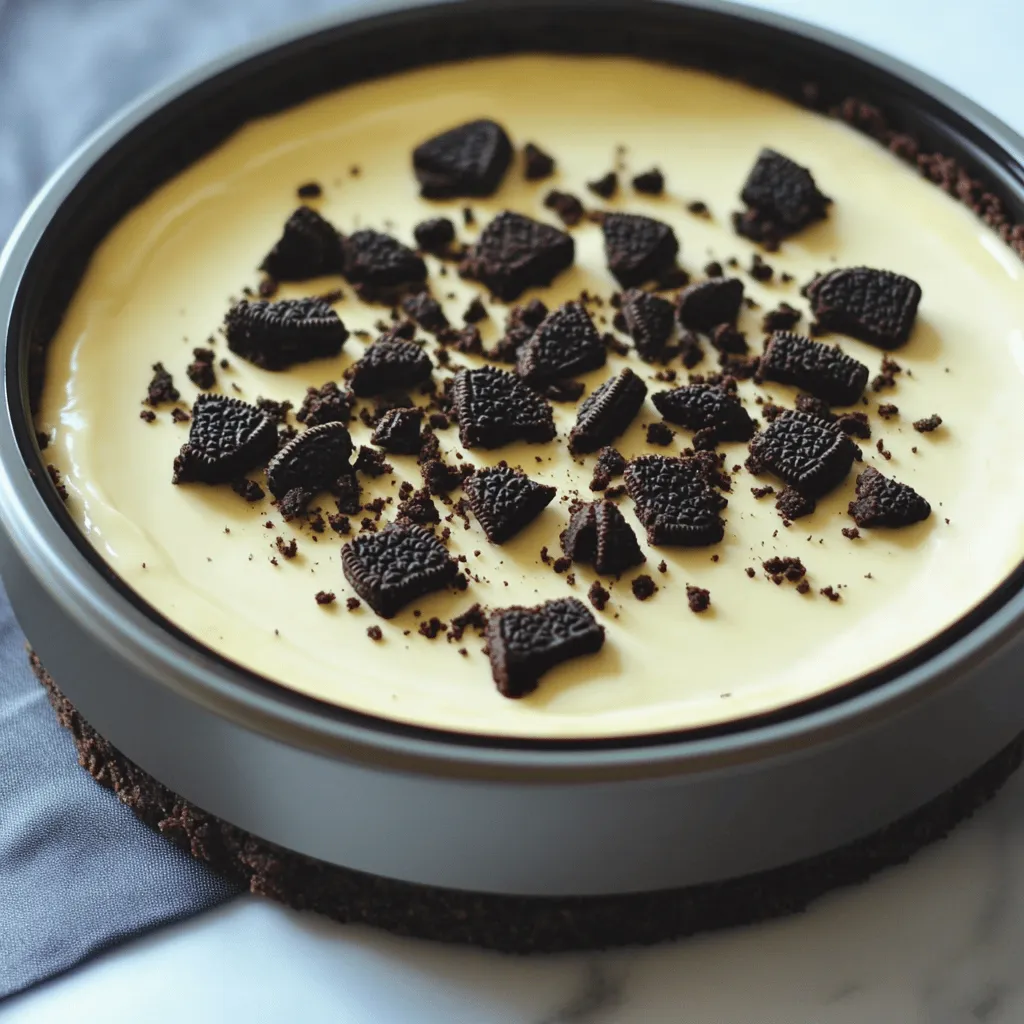
- Sprinkle 6 crushed Oreo cookies on top for decoration. You can also add chocolate shavings if you like.
- Cover the cheesecake with plastic wrap and refrigerate for at least 4 hours. For best flavor, let it chill overnight.
Tips & Tricks
Achieving the Perfect Texture
To get the best texture in your no bake Oreo cheesecake, use room temperature cream cheese. Cold cream cheese is hard to mix and can leave lumps. Soft cream cheese blends smoothly, giving you that creamy filling you want.
When folding in the whipped cream, use a spatula and a gentle hand. Start by adding a bit of whipped cream to the cream cheese mix. This makes it lighter. Then, fold the rest in slowly. This keeps the air in the whipped cream, making your cheesecake fluffy.
Troubleshooting Common Issues
If your cheesecake is too dense, it might be from overmixing the cream cheese. Mix only until smooth. If it’s still thick, try adding a splash of milk for a lighter texture.
If you notice separation in the filling, it might be from not folding the whipped cream properly. Next time, fold gently and ensure the whipped cream is very cold. This helps keep everything together.
Presentation Ideas
For decorative toppings, think of crushed Oreos, chocolate shavings, or whipped cream. You can also try fresh fruit like raspberries or strawberries for a pop of color.
For serving, slice the cheesecake into small pieces. Serve it on dessert plates with a side of whipped cream. A sprinkle of crushed Oreos on top makes it look fancy. Enjoy!
Variations
Flavor Variations
You can change the flavor of your no bake Oreo cheesecake easily. Try adding peanut butter for a nutty twist. Just mix in half a cup of peanut butter when you blend the cream cheese. You can also add melted chocolate. Use about half a cup, and mix it in with the cream cheese and sugar. For seasonal fun, consider pumpkin spice. Just add a cup of pumpkin puree and some pumpkin spice during mixing. This gives the cheesecake a warm, cozy taste.
Crust Alternatives
If you need a gluten-free option, use gluten-free cookies. They work just like regular Oreos. You can also switch up the cookies you use. Try using chocolate sandwich cookies or even graham crackers for a different flavor. Each type of cookie adds its unique touch to the crust.
Themed Cheesecakes
You can make themed cheesecakes for holidays. For Halloween, add orange food coloring to the filling and top it with candy corn. For Christmas, use peppermint extract and sprinkle crushed candy canes on top. You can also create layered cheesecakes. Make a chocolate layer and then add a vanilla layer on top. This gives a beautiful look and taste.
Storage Info
Refrigeration Guidelines
To store leftovers, cover the cheesecake with plastic wrap or foil. This keeps it fresh and prevents odors from the fridge. I recommend using a springform pan for easy removal and serving. If you have extra cheesecake, slice it into pieces before storing. This way, you can grab a slice whenever you want a treat.
Freezing the Cheesecake
To freeze the cheesecake, let it cool completely first. Wrap it tightly in plastic wrap, then cover it with foil. This prevents freezer burn and keeps it tasty. When you are ready to enjoy it, move the cheesecake to the fridge to thaw overnight. This way, it keeps its creamy texture. For best results, do not refreeze it once thawed.
Shelf Life
In the fridge, the cheesecake lasts about 5 days. If you want to keep it longer, freezing is best. Look for signs that it has gone bad. If you see mold or if it smells off, it’s time to toss it. Always trust your senses; they will guide you well.
FAQs
Can I use low-fat cream cheese?
Yes, you can use low-fat cream cheese. However, it may change the taste and texture. Low-fat cream cheese is less creamy. Your cheesecake might be less rich and dense. If you want a lighter cheesecake, this is a good option. Just know it may not taste as full.
How long does it take to set?
For the best results, chill the cheesecake for at least four hours. I prefer to leave it overnight. This helps the flavors blend well. It also makes the cheesecake firmer. If you cut it too soon, it might not hold together well.
Can I make it ahead of time?
Absolutely! You can make this cheesecake a day or two ahead. Just store it in the fridge. Cover it tightly with plastic wrap. This keeps it fresh and tasty. Making it in advance saves time on special days. It lets you enjoy more time with your guests.
You learned how to make a delicious cheesecake using simple ingredients. We covered everything from preparing the crust to assembling the filling. I shared tips for perfect texture and solutions for common problems. You can explore different flavors and variations, plus storage tips to keep it fresh. Making cheesecake can be fun and rewarding. Now, you can impress friends and family with your tasty creation. Enjoy every bite and happy baking!


Leave a Reply