Chocolate Chip Cookie Dough Truffles Irresistible Treat

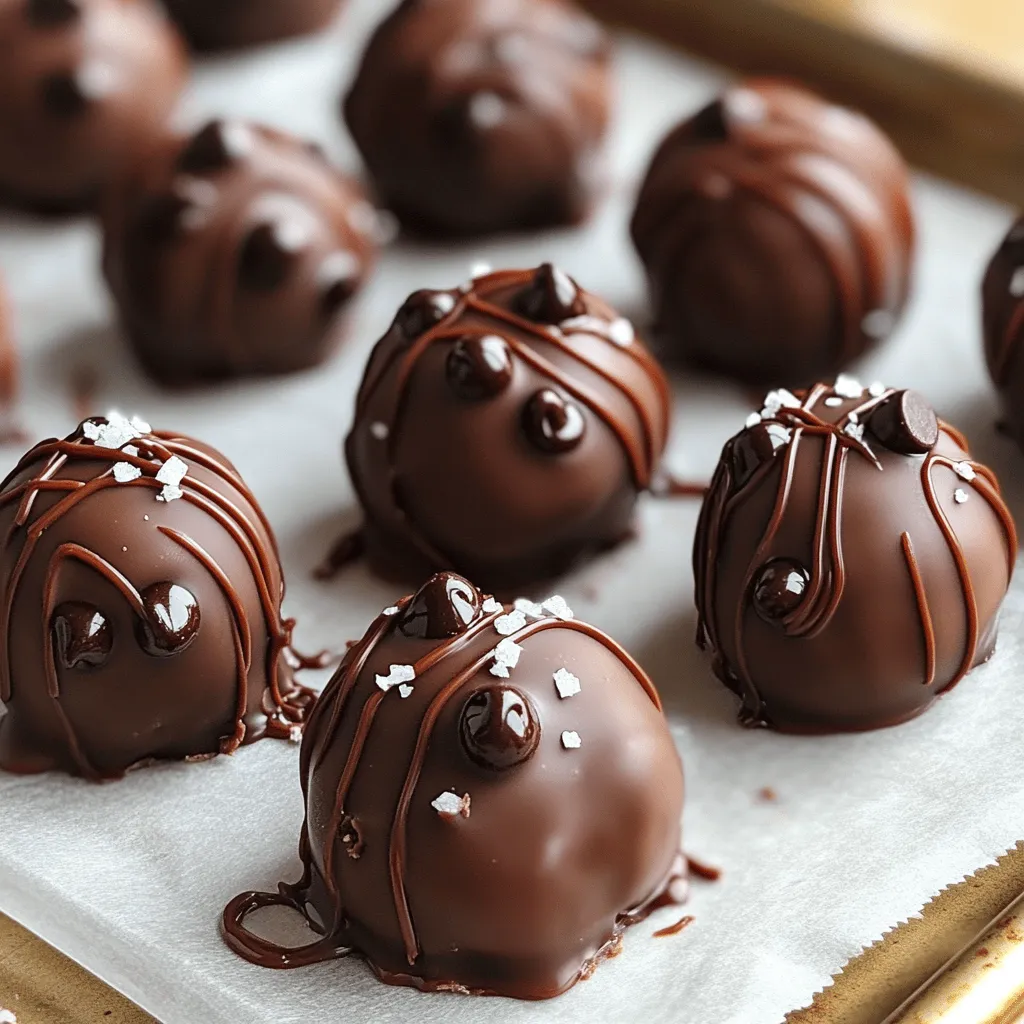
If you love sweet treats, you have to try my Chocolate Chip Cookie Dough Truffles. They are easy to make and taste amazing! You’ll combine simple ingredients, create a soft dough, and enjoy a chocolatey bite of heaven. Perfect for parties or just a snack at home, these truffles are sure to please everyone. Let’s dive into the details and make these irresistible delights together!

- 1 cup all-purpose flour (heat-treated for safety) - 1/2 cup unsalted butter, softened - 1/2 cup packed brown sugar - 1/4 cup granulated sugar - 1 teaspoon pure vanilla extract - 1/4 teaspoon sea salt - 1/2 cup mini chocolate chips - 1 cup chocolate chips (for coating) - 1 teaspoon coconut oil (for melting chocolate) For this recipe, precise measurements matter. If you do not have mini chocolate chips, you can use regular ones. You can replace unsalted butter with coconut oil if needed. If you want a richer flavor, use dark brown sugar instead of light brown sugar. If you prefer a gluten-free version, substitute the all-purpose flour with a gluten-free blend designed for baking. Just make sure it has xanthan gum if needed for structure. Using high-quality ingredients makes a difference. For butter, choose unsalted and fresh, as it affects taste and texture. Organic sugar offers a more natural flavor. When choosing chocolate chips, opt for high cocoa content for better taste. Heat-treating the flour is important for safety. You can do this by microwaving it for about 1 minute, stirring halfway through. This step kills any harmful bacteria. Always use fresh ingredients for the best flavor and texture. Start by gathering your ingredients. You need: - 1 cup all-purpose flour (heat-treated for safety) - 1/2 cup unsalted butter, softened - 1/2 cup packed brown sugar - 1/4 cup granulated sugar - 1 teaspoon pure vanilla extract - 1/4 teaspoon sea salt - 1/2 cup mini chocolate chips In a large bowl, beat the softened butter, brown sugar, and granulated sugar together. Use an electric mixer for about 2-3 minutes until it is creamy. Add the vanilla extract and sea salt. Mix until it smells great. Gradually add the heat-treated flour. Use a spatula to fold it in. Make sure no raw flour shows. Next, gently fold in the mini chocolate chips. With clean hands, scoop out small portions of the dough. Roll them into balls about 1 inch big. Place the balls on a parchment-lined baking sheet, leaving space between each. Now, transfer the sheet to the freezer. Chill the dough balls for at least 30 minutes. They need to feel firm to the touch. While the dough chills, prepare the chocolate coating. In a microwave-safe bowl, melt 1 cup of chocolate chips with 1 teaspoon of coconut oil. Heat in 30-second bursts, stirring in between. Stop when the chocolate is smooth and shiny. Once the dough balls are firm, dip each one in the melted chocolate. Use a fork or your hands to coat them evenly. Place the coated truffles back on the parchment sheet. For a nice touch, drizzle extra melted chocolate on top or sprinkle a little sea salt. Finally, refrigerate the truffles for 15-20 minutes until the chocolate is set and firm. To get a great coating on your truffles, follow these steps: - Use high-quality chocolate chips for a smooth melt. - Mix in a little coconut oil with your chocolate. This helps it coat better. - Dip the chilled cookie dough balls quickly in the chocolate. This keeps the coating crisp. - Let the truffles set on parchment paper to avoid sticking. Here are some mistakes to steer clear of: - Don’t skip chilling the dough balls. This helps them hold shape. - Avoid overheating the chocolate. Heat it slowly in short bursts. - Don’t rush the coating process. Take your time for an even layer. - Use too much flour can make the dough dry. Measure carefully! To get the right texture for your cookie dough truffles: - Make sure your butter is softened but not melted. This adds fluffiness. - Fold in the mini chocolate chips gently. This keeps the dough light. - Chill the dough for at least 30 minutes. This firms it up nicely. - Keep the chocolate warm, but not hot, when coating. This ensures a smooth finish. Follow these tips for amazing truffles that will impress everyone! {{image_4}} You can make your truffles even more fun! Try adding nut butters like peanut or almond. A spoonful gives a nice twist. You can also mix in different extracts. Almond or hazelnut extracts add depth. Just swap in 1 teaspoon of your favorite extract. Want vegan or gluten-free truffles? For vegan options, use coconut oil instead of butter. Also, choose dairy-free chocolate chips. For gluten-free, swap all-purpose flour with almond flour. Ensure the flour is heat-treated to keep it safe. Get creative with your coatings! Instead of just chocolate, try white chocolate or dark chocolate. You can also roll your truffles in crushed nuts or sprinkles. Drizzle melted chocolate on top for a fancy look. A sprinkle of sea salt adds a nice touch too! To keep your chocolate chip cookie dough truffles fresh, store them in an airtight container. This will help lock in the flavor and texture. Place a piece of parchment paper between layers if you stack them. This prevents sticking. When stored properly in the fridge, these truffles last about one week. If you do not eat them all, don’t worry! They still taste great after a few days. Just make sure to check for any signs of spoilage. To freeze your truffles, place them in a single layer on a baking sheet. Freeze for about an hour until firm. Then, transfer them to an airtight container or freezer bag. They can last up to three months in the freezer. When you want to enjoy them, just thaw in the fridge for a few hours. No, using regular flour is not safe. Raw flour can carry harmful bacteria. Heat-treated flour is safe to eat without cooking. To heat-treat flour, spread it on a baking sheet. Bake at 350°F for about five minutes. Let it cool before using it in your truffles. You can find pre-made truffles at many local stores. Check specialty shops or gourmet markets. Some stores offer them in the frozen section. Online retailers also sell them. Brands like Doughp and Edoughble offer tasty options too. Yes, you can make these truffles ahead of time. Prepare the dough, roll the balls, and freeze them. They stay fresh for a month in the freezer. Just coat them in chocolate before serving. This way, you always have a treat ready! This blog post covered how to make delicious truffles step by step. We looked at key ingredients and easy measurements. I shared tips for the right texture and ways to avoid common mistakes. You also learned about tasty variations and smart storage methods. In the end, making truffles is fun and simple. Try different flavors and coatings to make it your own. Enjoy your tasty creations with friends and family!

Ingredients

List of Ingredients

– 1 cup all-purpose flour (heat-treated for safety)

– 1/2 cup unsalted butter, softened

– 1/2 cup packed brown sugar

– 1/4 cup granulated sugar

– 1 teaspoon pure vanilla extract

– 1/4 teaspoon sea salt

– 1/2 cup mini chocolate chips

– 1 cup chocolate chips (for coating)

– 1 teaspoon coconut oil (for melting chocolate)

Measurements and Substitutions

For this recipe, precise measurements matter. If you do not have mini chocolate chips, you can use regular ones. You can replace unsalted butter with coconut oil if needed. If you want a richer flavor, use dark brown sugar instead of light brown sugar.

If you prefer a gluten-free version, substitute the all-purpose flour with a gluten-free blend designed for baking. Just make sure it has xanthan gum if needed for structure.

Notes on Ingredient Quality

Using high-quality ingredients makes a difference. For butter, choose unsalted and fresh, as it affects taste and texture. Organic sugar offers a more natural flavor. When choosing chocolate chips, opt for high cocoa content for better taste.

Heat-treating the flour is important for safety. You can do this by microwaving it for about 1 minute, stirring halfway through. This step kills any harmful bacteria. Always use fresh ingredients for the best flavor and texture.

Step-by-Step Instructions

Preparation and Mixing

Start by gathering your ingredients. You need:

– 1 cup all-purpose flour (heat-treated for safety)

– 1/2 cup unsalted butter, softened

– 1/2 cup packed brown sugar

– 1/4 cup granulated sugar

– 1 teaspoon pure vanilla extract

– 1/4 teaspoon sea salt

– 1/2 cup mini chocolate chips

In a large bowl, beat the softened butter, brown sugar, and granulated sugar together. Use an electric mixer for about 2-3 minutes until it is creamy. Add the vanilla extract and sea salt. Mix until it smells great. Gradually add the heat-treated flour. Use a spatula to fold it in. Make sure no raw flour shows. Next, gently fold in the mini chocolate chips.

Forming and Chilling the Dough

With clean hands, scoop out small portions of the dough. Roll them into balls about 1 inch big. Place the balls on a parchment-lined baking sheet, leaving space between each. Now, transfer the sheet to the freezer. Chill the dough balls for at least 30 minutes. They need to feel firm to the touch.

Coating and Setting the Truffles

While the dough chills, prepare the chocolate coating. In a microwave-safe bowl, melt 1 cup of chocolate chips with 1 teaspoon of coconut oil. Heat in 30-second bursts, stirring in between. Stop when the chocolate is smooth and shiny. Once the dough balls are firm, dip each one in the melted chocolate. Use a fork or your hands to coat them evenly. Place the coated truffles back on the parchment sheet. For a nice touch, drizzle extra melted chocolate on top or sprinkle a little sea salt. Finally, refrigerate the truffles for 15-20 minutes until the chocolate is set and firm.

Tips & Tricks

Best Practices for Ensuring Crisp Coating

To get a great coating on your truffles, follow these steps:

– Use high-quality chocolate chips for a smooth melt.

– Mix in a little coconut oil with your chocolate. This helps it coat better.

– Dip the chilled cookie dough balls quickly in the chocolate. This keeps the coating crisp.

– Let the truffles set on parchment paper to avoid sticking.

Common Mistakes to Avoid

Here are some mistakes to steer clear of:

– Don’t skip chilling the dough balls. This helps them hold shape.

– Avoid overheating the chocolate. Heat it slowly in short bursts.

– Don’t rush the coating process. Take your time for an even layer.

– Use too much flour can make the dough dry. Measure carefully!

How to Achieve the Perfect Texture

To get the right texture for your cookie dough truffles:

– Make sure your butter is softened but not melted. This adds fluffiness.

– Fold in the mini chocolate chips gently. This keeps the dough light.

– Chill the dough for at least 30 minutes. This firms it up nicely.

– Keep the chocolate warm, but not hot, when coating. This ensures a smooth finish.

Follow these tips for amazing truffles that will impress everyone!

Variations

Flavor Additions

You can make your truffles even more fun! Try adding nut butters like peanut or almond. A spoonful gives a nice twist. You can also mix in different extracts. Almond or hazelnut extracts add depth. Just swap in 1 teaspoon of your favorite extract.

Dietary Modifications

Want vegan or gluten-free truffles? For vegan options, use coconut oil instead of butter. Also, choose dairy-free chocolate chips. For gluten-free, swap all-purpose flour with almond flour. Ensure the flour is heat-treated to keep it safe.

Creative Coatings and Toppings

Get creative with your coatings! Instead of just chocolate, try white chocolate or dark chocolate. You can also roll your truffles in crushed nuts or sprinkles. Drizzle melted chocolate on top for a fancy look. A sprinkle of sea salt adds a nice touch too!

Storage Info

Best Storage Methods for Freshness

To keep your chocolate chip cookie dough truffles fresh, store them in an airtight container. This will help lock in the flavor and texture. Place a piece of parchment paper between layers if you stack them. This prevents sticking.

How Long Truffles Will Last

When stored properly in the fridge, these truffles last about one week. If you do not eat them all, don’t worry! They still taste great after a few days. Just make sure to check for any signs of spoilage.

Freezing Instructions

To freeze your truffles, place them in a single layer on a baking sheet. Freeze for about an hour until firm. Then, transfer them to an airtight container or freezer bag. They can last up to three months in the freezer. When you want to enjoy them, just thaw in the fridge for a few hours.

FAQs

Can I use regular flour instead of heat-treated flour?

No, using regular flour is not safe. Raw flour can carry harmful bacteria. Heat-treated flour is safe to eat without cooking. To heat-treat flour, spread it on a baking sheet. Bake at 350°F for about five minutes. Let it cool before using it in your truffles.

Where can I buy pre-made chocolate chip cookie dough truffles?

You can find pre-made truffles at many local stores. Check specialty shops or gourmet markets. Some stores offer them in the frozen section. Online retailers also sell them. Brands like Doughp and Edoughble offer tasty options too.

Can I make these truffles in advance?

Yes, you can make these truffles ahead of time. Prepare the dough, roll the balls, and freeze them. They stay fresh for a month in the freezer. Just coat them in chocolate before serving. This way, you always have a treat ready!

This blog post covered how to make delicious truffles step by step. We looked at key ingredients and easy measurements. I shared tips for the right texture and ways to avoid common mistakes. You also learned about tasty variations and smart storage methods.

In the end, making truffles is fun and simple. Try different flavors and coatings to make it your own. Enjoy your tasty creations with friends and family!

- 1 cup all-purpose flour (heat-treated for safety) - 1/2 cup unsalted butter, softened - 1/2 cup packed brown sugar - 1/4 cup granulated sugar - 1 teaspoon pure vanilla extract - 1/4 teaspoon sea salt - 1/2 cup mini chocolate chips - 1 cup chocolate chips (for coating) - 1 teaspoon coconut oil (for melting chocolate) For this recipe, precise measurements matter. If you do not have mini chocolate chips, you can use regular ones. You can replace unsalted butter with coconut oil if needed. If you want a richer flavor, use dark brown sugar instead of light brown sugar. If you prefer a gluten-free version, substitute the all-purpose flour with a gluten-free blend designed for baking. Just make sure it has xanthan gum if needed for structure. Using high-quality ingredients makes a difference. For butter, choose unsalted and fresh, as it affects taste and texture. Organic sugar offers a more natural flavor. When choosing chocolate chips, opt for high cocoa content for better taste. Heat-treating the flour is important for safety. You can do this by microwaving it for about 1 minute, stirring halfway through. This step kills any harmful bacteria. Always use fresh ingredients for the best flavor and texture. Start by gathering your ingredients. You need: - 1 cup all-purpose flour (heat-treated for safety) - 1/2 cup unsalted butter, softened - 1/2 cup packed brown sugar - 1/4 cup granulated sugar - 1 teaspoon pure vanilla extract - 1/4 teaspoon sea salt - 1/2 cup mini chocolate chips In a large bowl, beat the softened butter, brown sugar, and granulated sugar together. Use an electric mixer for about 2-3 minutes until it is creamy. Add the vanilla extract and sea salt. Mix until it smells great. Gradually add the heat-treated flour. Use a spatula to fold it in. Make sure no raw flour shows. Next, gently fold in the mini chocolate chips. With clean hands, scoop out small portions of the dough. Roll them into balls about 1 inch big. Place the balls on a parchment-lined baking sheet, leaving space between each. Now, transfer the sheet to the freezer. Chill the dough balls for at least 30 minutes. They need to feel firm to the touch. While the dough chills, prepare the chocolate coating. In a microwave-safe bowl, melt 1 cup of chocolate chips with 1 teaspoon of coconut oil. Heat in 30-second bursts, stirring in between. Stop when the chocolate is smooth and shiny. Once the dough balls are firm, dip each one in the melted chocolate. Use a fork or your hands to coat them evenly. Place the coated truffles back on the parchment sheet. For a nice touch, drizzle extra melted chocolate on top or sprinkle a little sea salt. Finally, refrigerate the truffles for 15-20 minutes until the chocolate is set and firm. To get a great coating on your truffles, follow these steps: - Use high-quality chocolate chips for a smooth melt. - Mix in a little coconut oil with your chocolate. This helps it coat better. - Dip the chilled cookie dough balls quickly in the chocolate. This keeps the coating crisp. - Let the truffles set on parchment paper to avoid sticking. Here are some mistakes to steer clear of: - Don’t skip chilling the dough balls. This helps them hold shape. - Avoid overheating the chocolate. Heat it slowly in short bursts. - Don’t rush the coating process. Take your time for an even layer. - Use too much flour can make the dough dry. Measure carefully! To get the right texture for your cookie dough truffles: - Make sure your butter is softened but not melted. This adds fluffiness. - Fold in the mini chocolate chips gently. This keeps the dough light. - Chill the dough for at least 30 minutes. This firms it up nicely. - Keep the chocolate warm, but not hot, when coating. This ensures a smooth finish. Follow these tips for amazing truffles that will impress everyone! {{image_4}} You can make your truffles even more fun! Try adding nut butters like peanut or almond. A spoonful gives a nice twist. You can also mix in different extracts. Almond or hazelnut extracts add depth. Just swap in 1 teaspoon of your favorite extract. Want vegan or gluten-free truffles? For vegan options, use coconut oil instead of butter. Also, choose dairy-free chocolate chips. For gluten-free, swap all-purpose flour with almond flour. Ensure the flour is heat-treated to keep it safe. Get creative with your coatings! Instead of just chocolate, try white chocolate or dark chocolate. You can also roll your truffles in crushed nuts or sprinkles. Drizzle melted chocolate on top for a fancy look. A sprinkle of sea salt adds a nice touch too! To keep your chocolate chip cookie dough truffles fresh, store them in an airtight container. This will help lock in the flavor and texture. Place a piece of parchment paper between layers if you stack them. This prevents sticking. When stored properly in the fridge, these truffles last about one week. If you do not eat them all, don’t worry! They still taste great after a few days. Just make sure to check for any signs of spoilage. To freeze your truffles, place them in a single layer on a baking sheet. Freeze for about an hour until firm. Then, transfer them to an airtight container or freezer bag. They can last up to three months in the freezer. When you want to enjoy them, just thaw in the fridge for a few hours. No, using regular flour is not safe. Raw flour can carry harmful bacteria. Heat-treated flour is safe to eat without cooking. To heat-treat flour, spread it on a baking sheet. Bake at 350°F for about five minutes. Let it cool before using it in your truffles. You can find pre-made truffles at many local stores. Check specialty shops or gourmet markets. Some stores offer them in the frozen section. Online retailers also sell them. Brands like Doughp and Edoughble offer tasty options too. Yes, you can make these truffles ahead of time. Prepare the dough, roll the balls, and freeze them. They stay fresh for a month in the freezer. Just coat them in chocolate before serving. This way, you always have a treat ready! This blog post covered how to make delicious truffles step by step. We looked at key ingredients and easy measurements. I shared tips for the right texture and ways to avoid common mistakes. You also learned about tasty variations and smart storage methods. In the end, making truffles is fun and simple. Try different flavors and coatings to make it your own. Enjoy your tasty creations with friends and family!

Chocolate Chip Cookie Dough Truffles

Indulge in these irresistible Chocolate Chip Cookie Dough Truffles that combine the best of cookie dough and chocolate! With simple ingredients like softened butter, brown sugar, and mini chocolate chips, you can create a heavenly treat in under an hour. Perfect for sharing or your own sweet cravings, these truffles are easy to make and utterly delicious.

Ingredients
  

1 cup all-purpose flour (heat-treated for safety)

1/2 cup unsalted butter, softened to room temperature

1/2 cup packed brown sugar

1/4 cup granulated sugar

1 teaspoon pure vanilla extract

1/4 teaspoon sea salt

1/2 cup mini chocolate chips

1 cup chocolate chips (for coating)

1 teaspoon coconut oil (for melting chocolate)

Instructions
 

In a large mixing bowl, use an electric mixer to beat the softened butter together with the packed brown sugar and granulated sugar until the mixture is creamy and smooth, about 2-3 minutes.

    Pour in the vanilla extract and sprinkle in the sea salt, mixing until fully combined and fragrant.

      Slowly add the heat-treated all-purpose flour to the mixture, using a spatula to fold until there are no traces of raw flour left. Take your time to ensure the mixture is well blended.

        Gently fold in the mini chocolate chips, making sure they are evenly distributed throughout the cookie dough.

          With clean hands, scoop out small portions of the dough and roll them into balls approximately 1 inch in diameter. Place these dough balls onto a parchment-lined baking sheet, leaving a little space between each.

            Transfer the baking sheet to the freezer and allow the cookie dough balls to chill for at least 30 minutes, or until they are firm to the touch.

              While the dough is chilling, prepare the chocolate coating by melting the chocolate chips combined with coconut oil in a microwave-safe bowl. Heat in 30-second intervals, stirring after each, until you have a glossy, smooth consistency.

                Once the cookie dough balls are firm, take them out of the freezer. Using a fork or your hands, dip each ball into the warmed melted chocolate, ensuring they are evenly coated all around.

                  Carefully place the chocolate-coated truffles back onto the parchment-lined baking sheet.

                    Optional: For an extra touch of elegance, drizzle additional melted chocolate over the truffles or sprinkle them with a pinch of sea salt.

                      Finally, refrigerate the truffles until the chocolate coating is set and firm, about 15-20 minutes.

                        Prep Time: 15 minutes | Total Time: 1 hour | Servings: 12 truffles

                          - Presentation Tips: Serve the truffles in a decorative box or on a festive platter, garnished with a sprinkle of mini chocolate chips or a dusting of powdered sugar for a delightful finish.